Podcast Production 1 – Recording with Pamela for Skype
This will be a series of tutorial posts on the steps I go through to get an episode of the Elegant Code Cast published. There are 2 reasons I am writing this up:
- Several other Elegant Coders have volunteered to help produce shows and I want to provide a tutorial. Thank you, guys!
- I hope like mad that one of our readers will see how I am doing this inefficiently and propose a new tool, process, or idea.
Recording the Episode
There are 2 ways I can record an episode: via Skype and with my Roland R-09 audio recorder. Quality is superb via the recorder, but more often we use Skype as the interviewee is in another state.
Note: In either scenario, I learned to always record in .WAV format. This is a higher fidelity format than MP3 and can be down converted later.
Using Skype and Pamela
Using Skype is actually using Pamela for Skype, an add-in that I purchased for Skype allowing recording of phone calls. A trial version can be downloaded from: http://www.pamela-systems.com/
Pamela Settings
There are some key settings in Pamela to ensure good recording.
- After installing Pamela, open Tools | Options | Call Recording tab as shown.
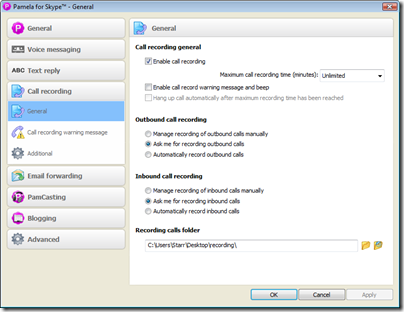
- Disable Enable call recording message and beep
- Set the Recording calls folder to wherever you would like the recording files to output.
- Open the Call Recording | Additional tab.
- Ensure Two-way call recording mode is set to Save in Stereo mode as shown.
This ensures your voice is recorded on one stereo channel, and the caller is recorded onto another channel. This is hugely helpful in post production when cutting out coughs, squeaks, and leveling.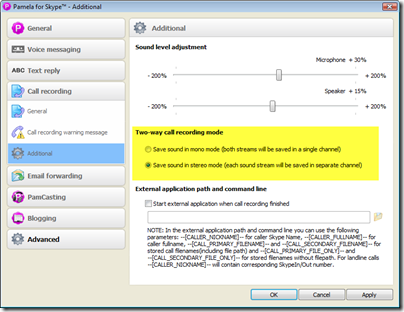
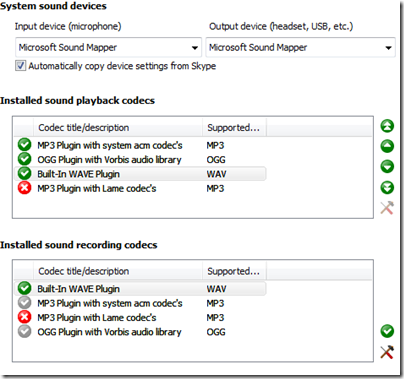
- Open the Advanced | Sound tab.
- Under Installed sound recording codecs, ensure WAV is activated as shown. You will probably need to active it, as MP3 is the default recording codec.
Recording the Call
The call is initiated in from within Pamela, which will start Skype. During this process, Skype and Pamela run in 2 separate windows, which can be a bit much to manage while keeping your interviewer head on straight. It is what it is.
- Start Pamela for Skype
Skype is also started. - A toast slice may pop up for Skype to confirm allowing Pamela to access the audio streams.
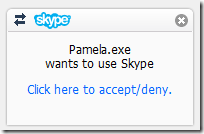
- If you see this dialog, accept the warning.
Skype opens - Click the link at the top of the Skype window linking to Pamela.exe.
The following window appears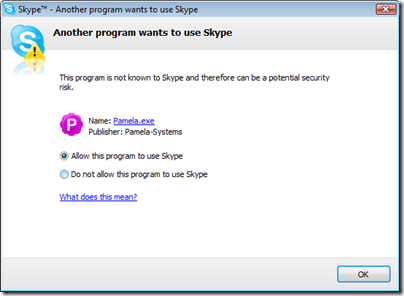
- Select Allow this program to use Skype
Note: This setting will be retained from here forward and Skype will remember this next time it opens. - Begin a Skype call as normal. Nothing magic here, just call someone or begin conference call.
- After the connection is made, a Pamela window appears.
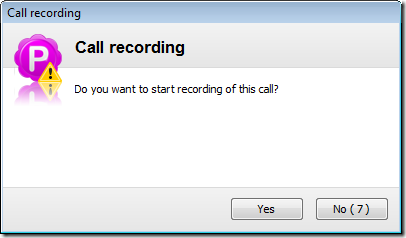
- Select Yes to record the call
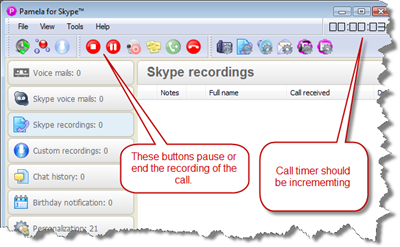
- In the open Pamela window, ensure the call is being recorded. There is a timer provided in the window to indicate how much of the call has been captured.
- Talk until the discussion is over.
- Press the Stop Recording button.
- After the call is finished, the recording will appear in a list under the Skype Recordings tab as shown.
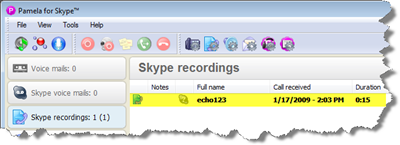
- Right click the recording | Open call recording folder to see the file in Windows Explorer.
- The WAV file itself is in the Pamela output folder available for you to begin doing show production, which we?ll cover in a future tutorial.
kkk
Thank you so much for taking the time and effort to make this – I have been searching for something that was easy to understand and idiot proof- why Skype do not do this only goodness knows- anyway- thank you again.
Elaine