Have you ever had the need to edit multiple cells with the same value? Well if you have, then this post is for you. I was cruising through the Infragistics forums today and saw a question about implementing multi-cell editing in the XamDataGrid. It was an old post, but a solution immediately popped into my head. So I figured I would post a simple solution to this common need.
I will be using the XamDataGrid from the NetAdvantage for WPF 11.2 release. Let?s start by creating a new WPF application and dragging a XamDataGrid onto our MainWindow.
????<igDP:XamDataGrid x:Name="_xamDataGrid">
????</igDP:XamDataGrid>
</Grid>
Now let?s create some data to use as a data source for our XamDataGrid. I have decided to use the clich? Person class. Noticed I implemented the INotifyPropertyChanged interface.
{
????private string _firstname;
????public string FirstName
????{
????????get { return _firstname; }
????????set
????????{
????????????_firstname = value;
????????????OnPropertyChanged("FirstName");
????????}
????}
????private string _lastName;
????public string LastName
????{
????????get { return _lastName; }
????????set
????????{
????????????_lastName = value;
????????????OnPropertyChanged("LastName");
????????}
????}
????private int _age;
????public int Age
????{
????????get { return _age; }
????????set
????????{
????????????_age = value;
????????????OnPropertyChanged("Age");
????????}
????}
????public static ObservableCollection<Person> GenerateSampleData()
????{
????????ObservableCollection<Person> _people = new ObservableCollection<Person>();
????????for (int i = 0; i < 25; i++)
????????{
????????????_people.Add(new Person() { FirstName = String.Format("First {0}", i), LastName = String.Format("Last {0}", i), Age = i * 2 });
????????}
????????return _people;
????}
????public event PropertyChangedEventHandler PropertyChanged;
????protected void OnPropertyChanged(string propertyName)
????{
????????var handler = PropertyChanged;
????????if (handler != null)
????????????handler(this, new PropertyChangedEventArgs(propertyName));
????}
}
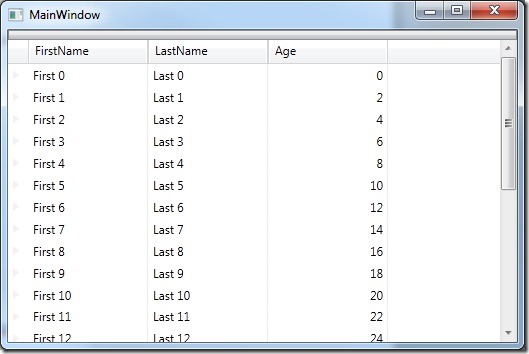
As you can see I also added a static method to generate some dummy data for my XamDataGrid. Here is what we have so far.
public MainWindow()
{
????InitializeComponent();
????_xamDataGrid.DataSource = Person.GenerateSampleData();
}
Now let?s plan out our multi-cell editing feature.
- The user will select the cells to be edited.
- The user will need to enable the multi-cell editing feature.
- The user will enter the value.
- The value should be updated in every selected cell.
Feature Implementation
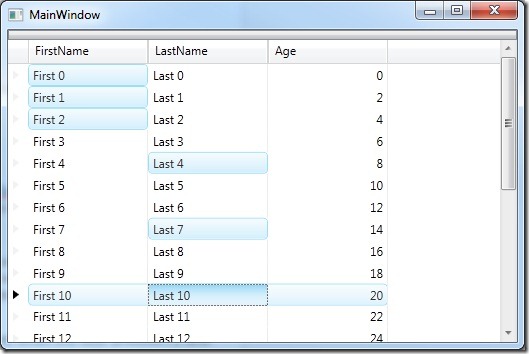
To enable cell selection in the XamDataGrid simply set the FieldSetting.CellClickAction to SelectCell and the FieldLayoutSettings.SelectionTypeCell to Extended.
????<igDP:XamDataGrid x:Name="_xamDataGrid">
????????<igDP:XamDataGrid.FieldLayoutSettings>
????????????<igDP:FieldLayoutSettings SelectionTypeCell="Extended" />
????????</igDP:XamDataGrid.FieldLayoutSettings>
????????<igDP:XamDataGrid.FieldSettings>
????????????<igDP:FieldSettings CellClickAction="SelectCell" />
????????</igDP:XamDataGrid.FieldSettings>
????</igDP:XamDataGrid>
</Grid>
We must determine at what point we will enable the multi-cell editing feature. In this example I will enable the multi-cell editing feature only when the F2 key has been pressed on the keyboard. You may have different rules on when to apply this feature, but for this post the F2 rule will work fine.
We need to handle the XamDataGrid.PreviewKeyDown event when the user presses F2 and store the selected cells in a list. We need to do this so we know which cells need to stay selected during editing and which cells to be updated with the new value. This must occur in the PreviewKeyDown event because we need access to the selected cells before the XamDataGrid.EditModeStarting event occurs.
{
????XamDataGrid grid = sender as XamDataGrid;
????if (e.Key == Key.F2)
????{
????????foreach (var item in grid.SelectedItems.Cells)
????????{
????????????_cells.Add(item);
????????}
????}
}
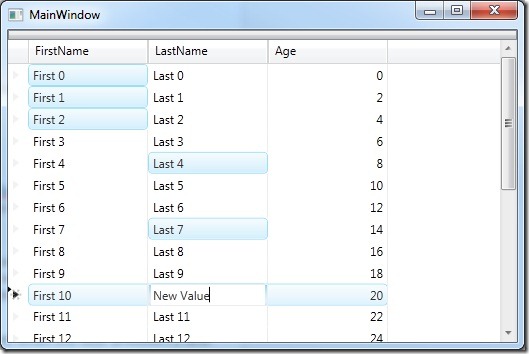
Immediately after the F2 key is pressed, the XamDataGrid will go into edit mode and the XamDataGrid.EditModeStarting event is then raised. This is where we want to loop through all the selected cells and make sure they stay selected. Otherwise the selected sells will be unselected once in edit mode. This will also give the user a visual cue of what cells will be updated.
{
????foreach (var cell in _cells)
????{
????????cell.IsSelected = true;
????}
}
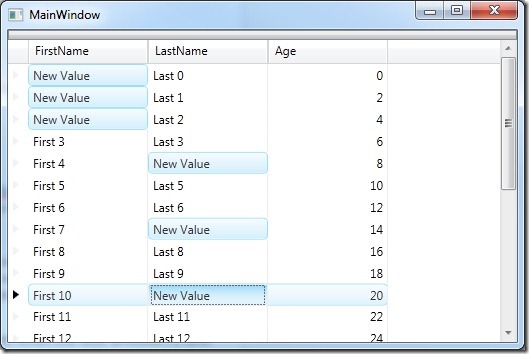
After the user has entered and committed a value, the XamDataGrid.EditModeEnding event will be raised. This is where we will loop through our selected cells, and using reflection, find the property to update on the corresponding Cell.Record.DataItem. After all the cells have been updated we need to clear our cells list.
{
????if (_cells.Count > 0)
????{
????????foreach (var cell in _cells)
????????{
????????????cell.Record.DataItem.GetType().GetProperty(cell.Field.Name).SetValue(cell.Record.DataItem, e.Editor.Value, null);
????????}
????????_cells.Clear();
????}
}
That?s it! Here is the result of all of our hard work.


