For more information on this series, please see the introductory post.
When working on an development team, one of the more challenging tasks can be building your integrated source code for deployment. Building a production version of the application may be a long and difficult process, especially if production builds are infrequent. Even a well-documented build procedure may take hours or days to complete and is probably prone to error. One person may have all the requisite knowledge to perform the build, causing delays or rifts for other team members when builds are needed.
Therefore, creating a repeatable build process that any team member can instantiate can provide great benefit for the team, reducing the risks in the build process. That is our purpose for this exercise ? to Just Build It!
For a production build system, your build server should be a mirror of your production environment. This helps reveal possible issues and risks before deploying to your production environment. For the purposes of this series, this is not necessary; however, you must have the following installed:
- Microsoft Visual Studio 2008
- A version control system(VCS), such as Subversion or Team Foundation Server.
- If you do not have a current VCS instance, consider VisualSVN Server
- Ensure that the system on which you will install TeamCity has the ability to check out files from your VCS natively. For Team Foundation Server, you must have Team Explorer installed. For Subversion, you must have SVN or TortoiseSVN installed.
- For a full list of supported systems, consult the TeamCity documentation
- ASP.NET MVC
- The sample AdventureMVC solution
- Added to your installed VCS
- Available from codeprogression.googlecode.com
- A zip file is available to download for utilization in your VCS
- You may also browse the source on the site
- The AdventureWorks database installed on SQL Server 2005 or SQL Express 2005
- Available from Microsoft downloads
- Update the web.config file to your specific database connection information prior to running the solution or any builds
- TeamCity 4.02 or later
Updated: As of 4/23/2009, TeamCity 4.5 is the current version- If you are using VisualSVN Server 1.7, you must download TeamCity 4.1 EAP or later
- For installation instructions, consult the TeamCity documentation.
- Note your installation directory and build server directories. These will be useful in the future.
- I usually locate my buildServer directory in the TeamCity installation directory rather than in the user profile folders.
- When choosing the port for the TeamCity website, be aware of other sites configured on the machine. Unless the server is dedicated to TeamCity operations, I suggest using port 8111.
Note: I am assuming that you will be installing all of these packages on one system for exploratory purposes. If you are not, you will need to adjust the instructions accordingly, especially in later posts. For example, you will need an instance of AdventureWorks on your development system and your build system. In a future post, I plan to explore the challenges of integrating databases into a continuous integration solution, such as TeamCity.
Your First Project
With TeamCity, the time between finishing installation and running the first build can literally be minutes. Lets get started.The minimum requirements for build configurations are:
- A project to house the configuration (TeamCity houses all build configurations within user-defined projects).
- A connection to a version control system
- A build runner
Start up the TeamCity site. Click on the ![]() Create Project link, name your project, provide a description of the project (optional), and click the Create Project link.
Create Project link, name your project, provide a description of the project (optional), and click the Create Project link.
Your First Build Configuration
 Click on Create Build Configuration (you have 20 total in the professional version).
On the General Settings, provide a name for your build configuration and an optional description. Leave the rest of the options on the General Settings page at their default.
Click on VCS Settings.
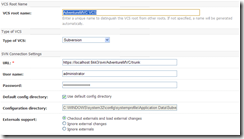
Name your VCS root and choose your VCS type. Fill out your VCS-specific settings. Ensure that the root of the source control directory is the trunk folder.
Here is my Subversion configuration for the example project:
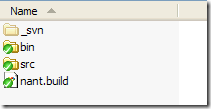
And my working directory:
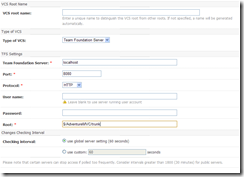
Here is a possible TFS configuration:
Test your connection and save. Once again, leave the rest of the options at their defaults.
Click on Choose Build Runner.
Select sln2008 from the Build Runner: option list. In the Solution file path: text box, enter src\AdventureMVC.sln. Change the text in the Confguration: text box to Debug.
Click Save.
Running Your Build
Click on the Projects tab in the top navigation. In your newly defined build configuration, click on the Run button (do not click the ellipse) and watch your build run.

If everything compiles, you should see a success message for your build. If not, check the error messages in the build log. You may have errors in your VCS configuration.
![]()
Congratulations! You have just completed and run your first build configuration!
You can find your compiled website in the TeamCity installation directory under \buildAgent\work\guid\src\PrecompiledWeb\Web.
Next: Continuous Integration (or Triggering Builds) and Creating Artifacts
Even with a source code version control system (VCS), ensuring each developer has a working, buildable version of source code can be a slippery slope. A developer may forget to check in a new file or dependent library. With a VCS based on optimistic locks, a careless developer may break another developer?s code during a merge operation. So, how do we make sure that the latest code is compiling code? By using Continuous Integration.
And, isn?t there an easier way to get at my compiled application? Yes, there is. Its called Artifacts.
Stay tuned.


4gZ63b comment1 ,