For more information on this series, please see the introductory post. This post also assumes that you have completed parts 1 and 2.
With our basic solution build, we want to start running our unit tests on every check-in, create a nightly build (that runs both unit and integration tests), and generate some artifacts.
Running Tests
First things first, lets get the tests running. Open the current build configuration and select the build runner navigation link (it should say Runner: sln2008). On the build runner page, select NUnit 2.4.8 from the NUnit runner combo box. Add the path to the unit test assembly in the assembly text box. For our solution, the path is: **/bin/debug/AdventureMVC.Tests.dll . As you can see, this is using an MSBuild wildcard format to find the correct assembly. It is unnecessary to point to the full path.
Save your changes.
Now, when your builds run, you should get a new status indicator showing how many tests passed.
If you click on the status, you will also see a new tab on the build results page showing the test information.
Nightly Builds (with integration tests)
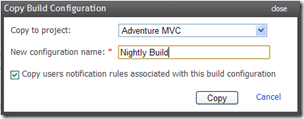
Now that we have our  unit tests running on every check-in, let?s create a nightly build. Open the current build configuration. Make a copy of the build by clicking on the Copy button on the right-hand side of the page.
Rename the new configuration as you see fit. I will use Nightly Build.
Select the build runner link. Add the integration test assembly to the test assembly text box.
Save your changes.
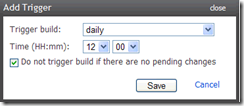
Select the Build triggering link. Deselect the check box. On the  Schedule tab, click on Add time trigger and configure your nightly build time. Save your changes. (You can test the build at this point by clicking on the Run button.)
Creating Artifacts
We want to make the compiled website readily available, so we are going to create some artifacts. Getting at the precompiled website through the file system is inconvenient.
If the example solution contained a website, compiling the solution would create a precompiled website. Since the example solution contains a web application project (specifically an ASP.NET MVC application project), I had to add a post-build event to create the precompiled site. Check the AdventureMVC project properties to see the syntax.
On the Nightly Build configuration page, select the General Settings link. In the Artifacts text box, type: PrecompiledWeb\Web=>PrecompiledWeb. Save your changes.
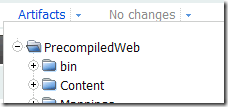
Now when you run your build, you should see an Artifacts dropdown link in the status line of the build.
When you click on the build status, the status page now has an artifacts tab.
Not only do you have the ability to download the individual files, you can now use these artifacts in other build configurations?but that is for another post.
Originally posted on CodeProgression.com on April 19, 2009
Upcoming posts:
-
Build scripts: We need some additional functionality that the basic solution runner doesn?t provide, such as zipping up artifacts.
-
Setting up notifications: We will look at the different options for notifications, such as email and the tray notifier.
-
Deployment: Using TeamCity and build scripts to update different deployment environments.


Thanks for the great posts on TeamCity.
This is what I was looking for
@Charl Victor No problem. Glad I could help.
Great info I hope you are going to post soon more on what is really interesting which is the add functionality to the runners