
To access the Azure APIs one needs to grab an access token to use as the bearer token for calling those APIs. In this article, we’ll look at how to do that using two different approaches. We’ll also see how to call those Azure APIs once you have your bearer token.
Typically, one has to log in to Azure using an interactive login process that is (hopefully) 2FA. This manual intervention means I can’t write something like a worker daemon using interactive login. We might also want to authenticate on the backend of a solution so that we can make API calls, and that isn’t interactive, either.
Even though the topic of this article contains, “Without a Prompted Login,” the principles and techniques in this article remain valid for authenticating web apps, mobile, or other types of applications.
Registering an Application in Azure
First, we must register your new application with Azure. One might think of an Application Registration as a mapping between your application and Azure. More specifically for our purposes, between your app and identity platform. Registering an application is simple and represents the app you are creating, even if it’s a console app like the one I am using to create the code below.
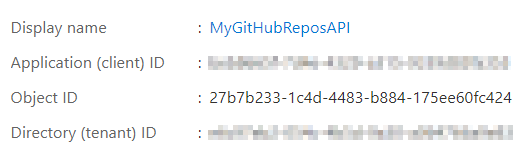
Getting your Client ID
Doesn’t it bug you when there is more than one term for things? Well, if you look at the overview page of your app registration, you’ll see a place to copy the Application (client) ID. These are terms that have caused some confusion, so we are going to refer to this as the client id for this article.
Copy the client id and the tenant id for later use.
Add a client secret
In the portal menu of the application registration, go to the Clients & secrets menu item as shown below.

It’s actually pretty self-evident how to create a secret in here, so go ahead and do so. Rember to grab that secret and store it somewhere quickly as you’ll never have a second chance to view it.
We’ll be using this secret to call into the authorization APIs so we are authenticated using this App Registration.
The OAuth Approach
The OAuth approach is a simple REST API model and the endpoint for OAuth login looks like this.
public class OAuthLoginService
{
    private const string Oauth = "https://login.microsoftonline.com/:tenant_id/oauth2/token";
    private readonly HttpClient _httpClient;

    public OAuthLoginService(HttpClient httpClient)
    {
        _httpClient = httpClient;
    }

    public async Task<string> Login(string tenantId, string clientId, string secret)
    {
         string oauthActual = Oauth.Replace(":tenant_id", tenantId);

        var kvps = new List<KeyValuePair<string, string>>
        {
            new KeyValuePair<string, string>("client_id", clientId),
            new KeyValuePair<string, string>("client_secret", secret),
            new KeyValuePair<string, string>("resource", "https://management.azure.com/"),
            new KeyValuePair<string, string>("grant_type", "client_credentials")
        };

        var content = new FormUrlEncodedContent(kvps);
        var response = await _httpClient.PostAsync(oauthActual, content);
        await using var body = await response.Content.ReadAsStreamAsync();
        var oAuthResponse = await JsonSerializer.DeserializeAsync<OAuthResponse>(body);

        return oAuthResponse.access_token;
    }
}
The oAuthResponse is a simple class to use in deserialization from JSON. Shown below.
public class OAuthResponse
{
    public string token_type { get; set; }
    public string expires_in { get; set; }
    public string ext_expires_in { get; set; }
    public string expires_on { get; set; }
    public string not_before { get; set; }
    public string resource { get; set; }
    public string access_token { get; set; }
}
And with that, we are returning a token. Note it’s the presence of the secret that makes this secure. Also note that the token is a JWT, and you can deserialize it to see claims. Upon doing so, we can see our claims are as follows. Each of these key pairs has a use beyond the scope of this article.
{
  "aud": "https://management.azure.com/",
  "iss": "https://sts.windows.net/e6c97eb2-054c-4b5d-9a30-a064766a9e83/",
  "iat": 1628123447,
  "nbf": 1628123447,
  "exp": 1628127347,
  "aio": "E2ZgYLhnIvUl2+2Z4Jno3ebX7pVvAAA=",
  "appid": "beb8665f-7d4e-4329-a315-9339d83fa353",
  "appidacr": "1",
  "idp": "https://sts.windows.net/e6c97eb2-054c-4b5d-9a30-a064766a9e83/",
  "oid": "b8921d53-91f3-41d9-b5ff-884472e5451c",
  "rh": "0.AUYAsn7J5kwFXUuaMKBkdmqeg19muL5OfSlDoxWTOdg_o1NGAAA.",
  "sub": "b8921d53-91f3-41d9-b5ff-884472e5451c",
  "tid": "e6c97eb2-054c-4b5d-9a30-a064766a9e83",
  "uti": "RmEERxXwKkuhL34ls5cgAA",
  "ver": "1.0",
  "xms_tcdt": 1583254592
}
The MSAL Approach
MSAL is a library that abstracts away the details of the REST calls you may be using and it uses the Microsoft Identity platform to resolve tokens. It also provides additional benefits like token caching and renewal. There are MSAL libraries for pretty much any language you might be working with. The examples in this article are using the MSAL.NET library.
As you might imagine, MSAL wants the same arguments you used earlier.
public class MsalLoginService
{
    public async Task<string> Login(string tenantId, string clientId, string clientSecret)
    {
        var authorityEndpoint = "https://login.microsoftonline.com/" + tenantId;
        var scopes = new List<string>()
        {
            "https://management.azure.com/.default"
        };

        var app = ConfidentialClientApplicationBuilder.Create(clientId)
            .WithClientSecret(clientSecret)
            .WithAuthority(new Uri(authorityEndpoint))
            .Build();

        var result = await app.AcquireTokenForClient(scopes)
            .ExecuteAsync();

        return result.AccessToken;
    }
}
Note the “/.default” in the code above.
Validating the token you receive might be of interest too.
Using the Token
Now that we’ve acquired this token, what do we do with it? Talking to the Azure REST APIs is a common thing to do, so let’s take a look at doing that. We’ll list all the resource groups in the current subscription. This code assumes you are familiar with JSON deserialization.
- Get the token
- Construct a request to an Azure API endpoint.
- Include
Authorization=Bearer <token>in your headers of the request - Call the endpoint
public class ResourceGroupsService
{
    private readonly HttpClient _httpClient;
    const string ResourceUri = "https://management.azure.com/subscriptions/:subscription_id/resourcegroups?api-version=2020-06-01";

    public ResourceGroupsService(HttpClient httpClient)
    {
        _httpClient = httpClient;
    }

    public async Task<ResourceGroupList> ListAll(string token, string subscriptionId)
    {
        var actualUri = ResourceUri.Replace(":subscription_id", subscriptionId);

        _httpClient.DefaultRequestHeaders.Add("Authorization", "Bearer " + token);

        var response = await _httpClient.GetAsync(actualUri);

        var body = await response.Content.ReadAsStreamAsync();
        var resourceGroups = await JsonSerializer.DeserializeAsync<ResourceGroupList>(body);

        return resourceGroups;
    }
}
This line will take the token from either the OAuth or the MSAL authorization. The token is the same regardless of which technique is used.
Task<ResourceGroupList> ListAll(string token, string subscriptionId)
I find the MSAL route more convenient, but the OAuth flow works just as well. Pick your technique and happy trails logging in with Microsoft API access tokens.